Donor gifts do more than acknowledge a contribution — they help strengthen relationships and make supporters feel genuinely appreciated. When someone takes the time and resources to support a cause, a thoughtful gift shows that their commitment matters.
Supporters tend to cherish gifts that feel personal and meaningful. Whether it includes their name, a campaign year, or a design connected to the mission, personalization adds emotional value and turns a simple item into a keepsake.
The best part? Creating personalized donor gifts doesn’t require a large budget or specialized production line. Many meaningful and creative options can be made at home with the right tools and techniques.
10+ Donor Gift Ideas That Supporters Actually Love
When choosing donor gifts, practical items with everyday usefulness tend to make the strongest impression. The more frequently supporters use the gift, the more often they are reminded of the cause they helped make possible. And when these items can also be customized, they become even more meaningful.

Here are some popular donor gift ideas that are especially suitable for personalization:
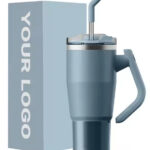
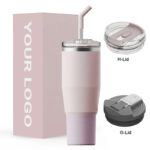
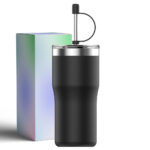
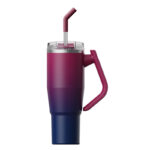
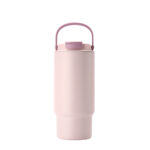
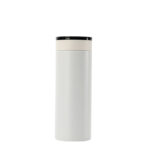
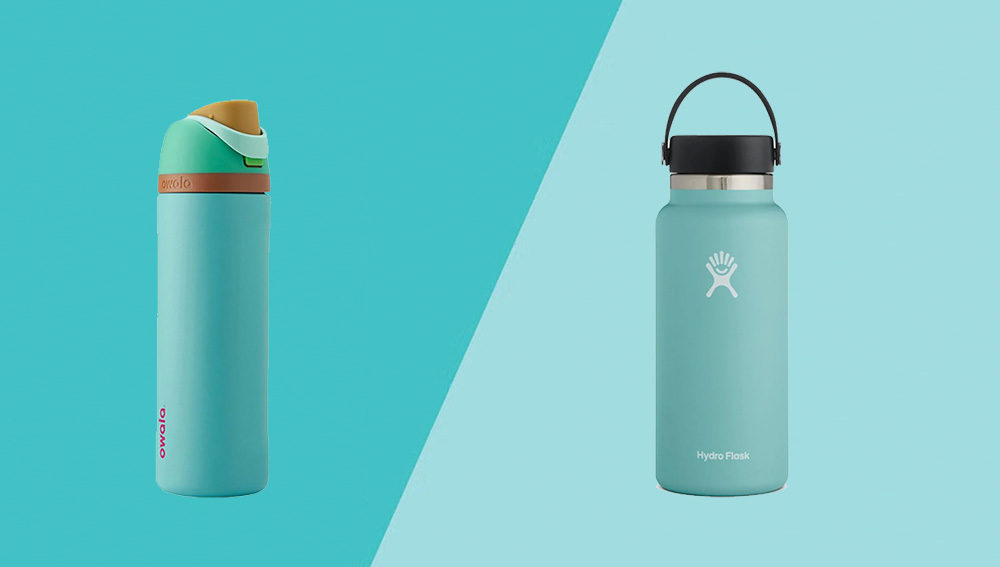
1. Stainless Steel Tumblers & Water Bottles
Durable, reusable, and universally loved — stainless steel drinkware is a top choice. These bottles are perfect for adding supporter names, organization logos, or annual fundraising themes.
2. Ceramic Mugs
A classic gift with endless design possibilities. Whether it’s a quote, illustration, or supporter name, mugs offer plenty of room for creativity.
3. Metal Keychains
Small, lightweight, and cost-friendly — keychains make great donor gifts that travel everywhere with the recipient.
4. Mouse Pads
Perfect for supporters who work remotely or in office environments. Custom prints make them personal and visually engaging.
5. Phone Cases
Useful and highly visible. Personalized phone cases are a modern way to keep your organization’s message in front of supporters every day.
6. Photo Frames
A small touch of personalization turns a simple frame into a sentimental keepsake — especially when paired with event or campaign photography.
7. Custom Coasters
Stylish and functional. Coasters are a great low-budget item that still feels premium when customized.
8. Canvas Tote Bags
Reusable bags are ideal for eco-friendly nonprofits. When printed with custom artwork or event designs, they become practical and meaningful.
9. Aluminum Bookmarks
A perfect option for book-loving supporters. Lightweight and easy to personalize, these make great thank-you gifts for education- or literacy-focused organizations.
10. Custom Ornaments
Seasonal or commemorative ornaments are a memorable way to celebrate annual giving milestones and holidays — and they work well for many customization techniques.
Each of these items can be personalized to create a unique supporter experience — whether you’re designing in small batches or making one-of-a-kind gifts. And the best part? Many of them can be customized right from home using some DIY techniques.
Why Personalized Donor Gifts Work So Well
A donor gift becomes far more meaningful when it feels personal. While generic items can be useful, customized gifts create a stronger emotional response because they acknowledge the individual behind the donation—not just the act of donating. When supporters see their name, a meaningful date, or artwork related to the cause, the gift becomes a reminder of their impact rather than just another item.
Personalization also helps reinforce long-term loyalty. Supporters are more likely to stay engaged when they feel recognized and included in the mission. That’s why personalized gifts are often kept longer, used more frequently, and shared proudly with friends, family, or colleagues. For nonprofits, this means more visibility and deeper supporter connection—both emotionally and practically.
Creating personalized donor gifts doesn’t have to be complicated or expensive. Today, nonprofits and small teams can easily customize items at home using accessible tools and creative methods. Some popular approaches include:
1. Sublimation Printing
Ideal for stainless steel tumblers, ceramic mugs, phone cases, and metal accessories. Sublimation creates vibrant, long-lasting designs that won’t fade, peel, or scratch. It offers a professional finish even when produced in small batches, which makes it especially suitable for donor gifts.
2. Vinyl Decals
Using a cutting machine like Cricut or Silhouette, vinyl decals can be applied to water bottles, ornaments, tote bags, and more. They’re versatile, affordable, and perfect for one-off or varied designs.
3. Hand-Painted Designs
For organizations that host community events, volunteer groups, or youth programs, hand-painting provides a meaningful hands-on element. Each item becomes one-of-a-kind, and supporters often cherish the craftsmanship.
4. Laser Engraving
Compact desktop engraving machines make it possible to engrave names, quotes, or symbols onto stainless steel, wood, leather, or metal. The final result feels premium and highly personalized.
5. Heat Transfer Paper
A simple printer and heat press (or even a household iron for some materials) can transform blank tote bags, T-shirts, or flags into customized gifts. This method is beginner-friendly and budget-friendly.
Personalized donor gifts work because they represent gratitude with intention—not just a gesture, but a memory. And with so many accessible customization methods available, organizations of any size can create gifts that feel thoughtful, meaningful, and unique to each supporter.
Why choose Sublimation and Why It Works So Well
As nonprofits explore different ways to create meaningful and personalized donor gifts, sublimation stands out as one of the most effective methods. It offers the handcrafted feel of DIY while delivering a polished, professional result—making it ideal for organizations that want high-quality customization without high production costs.
Sublimation is a printing process that uses heat to transform solid dye into a gas. Instead of simply sitting on the surface, the dye actually bonds with the coating of the item, creating a permanent, vivid, and detailed design.
How it works:
Solid dye → High heat → Dye turns into gas → Gas infuses into coated material → Permanent print

Because the design becomes part of the material rather than a layer on top, sublimation offers several advantages:
- Durability: The print doesn’t peel, crack, or fade over time.
- Vibrant colors: The heat process produces bright, crisp results perfect for logos, artwork, supporter names, or event themes.
- Smooth finish: No texture change or raised edges—just a seamless, professional look.
These benefits make sublimation especially popular for donor gifts such as:
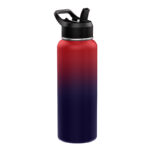
- Stainless steel water bottles
- Ceramic mugs
- Metal plaques and ornaments
- Mouse pads
- Phone accessories
Sublimation allows even small organizations to produce beautiful, fully customized gifts that look store-quality while keeping costs manageable. And because supporters love items that feel thoughtfully made, this method is a powerful way to elevate your gift program and deepen donor engagement.
How to Use Sublimation on Stainless Steel Tumblers
Stainless steel tumblers are among the most popular donor gifts because they’re practical, long-lasting, and universally appreciated. When combined with sublimation printing, they become even more meaningful—allowing nonprofits to feature supporter names, campaign themes, artwork, or inspirational designs with professional-quality results.
Below is a complete guide that nonprofits can follow, whether you’re producing a small batch for a donor event or planning ongoing personalized gifts.
1. Equipment and Materials You Need
To sublimate stainless steel tumblers, you’ll need the following:
Essential Equipment
- Sublimation printer (Sawgrass and Epson EcoTank conversions are common choices)
- Sublimation ink (must be compatible with your printer)
- Sublimation paper
- Heat-resistant tape
- Tumbler heat press or convection oven
- Heat-resistant gloves
- Heat shrink sleeves (only required for oven method)

Materials
- Sublimation-ready stainless steel tumblers
These must have a special polymer coating; regular uncoated tumblers cannot accept sublimation dye. - Lint roller or microfiber cloth
- Teflon sheet (optional, for protection during pressing)
2. Step-by-Step Guide to Sublimating Tumblers
Step 1: Prepare the Design
- Create artwork using design software (Canva, Illustrator, Photoshop, etc.).
- Ensure the design matches the tumbler’s printable area.
- Mirror (flip horizontally) any text before printing.
- Print using your sublimation printer on sublimation paper.
Step 2: Prep the Tumbler
- Clean the tumbler with a lint roller or microfiber cloth to remove dust and fingerprints.
- Ensure the surface is completely dry.
Step 3: Wrap the Design
- Cut the printed design to fit snugly around the tumbler.
- Wrap it tightly so there are no air gaps—this is crucial for a clean transfer.
- Secure the edges with heat-resistant tape.
- Tape the top and bottom edges as well to prevent ghosting.
Step 4: Apply Heat
You can use either method:
Option A: Tumbler Heat Press
- Preheat the press to 350–400°F (175–205°C).
- Place the tumbler inside and press for 45–60 seconds, depending on your equipment.
- Rotate the tumbler halfway and repeat the press time for even coverage.
Option B: Convection Oven
- Preheat the oven to 375°F (190°C).
- Place a heat shrink sleeve over the tumbler for even pressure.
- Heat for 5–7 minutes, rotating halfway through.
Step 5: Remove Wrap and Cool
- Using heat-resistant gloves, remove the tumbler from the press or oven.
- Peel off the paper and tape carefully while hot.
- Let the tumbler cool completely.
You should now see a bright, crisp design fully infused into the coating.
3. Important Tips and Safety Notes
To ensure the best results and avoid costly mistakes:
Prevent Ghosting
- Tape firmly and evenly.
- Avoid moving the paper once it’s taped.
- Rotate slowly and gently if using an oven.
Avoid Overheating
- Too much heat can cause yellowing or blurring.
- Always follow recommended temperatures and times for your equipment.
Ensure Even Pressure
- Loose wraps lead to faded spots.
- Press or shrink sleeves must fit tightly around the tumbler.
Mind the Coating
- Only use sublimation-ready tumblers with proper polymer coatings.
- Uncoated stainless steel cannot transfer sublimation dye.
Use Proper Ventilation
- Sublimation releases fumes during heating.
- Work in a well-ventilated area or use an exhaust fan.
Test Before Large Batches
- Different ovens, presses, and coatings may require small adjustments.
- Always test a single tumbler first.
Following these steps ensures you get reliable, beautiful results that look professional—even when made in-house.

Last not the least
Donor gifts are more than a simple gesture—they’re a powerful strategy for strengthening supporter relationships and building long-term commitment. When a gift feels thoughtful and personal, supporters are far more likely to remember the experience, stay connected with your mission, and continue contributing in meaningful ways.
Personalization is what transforms a small item into a lasting keepsake. Whether it’s a name, a campaign theme, or artwork that reflects your cause, customized gifts carry emotional value that mass-produced items simply can’t match.
The good news is that nonprofits don’t need a large budget to create gifts that feel special. Today’s DIY methods—especially sublimation—offer a practical, affordable way to achieve professional-level results. With the right tools, organizations can produce high-quality donor gifts that look polished, feel meaningful, and strengthen the bond between your mission and your supporters.
In the end, supporters don’t value gifts because they’re expensive. They value them because they feel genuine, thoughtful, and full of heart. A warm, personalized gift speaks louder than any price tag—and it’s often the gesture that supporters remember long after the campaign is over.